
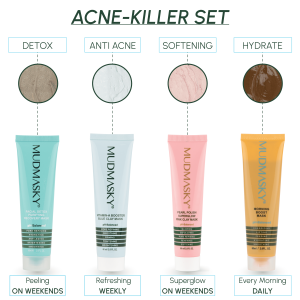
In the ever-expanding realm of skincare, the importance of patch testing cannot be overstated. It’s a crucial step to ensure that the products you incorporate into your routine are not only effective but also safe for your skin. In this comprehensive guide, we’ll delve into the ins and outs of patch testing and debunk a common misconception about its application.
What is a Patch Test?
A patch test involves applying a small amount of a skincare product to a discreet area of your skin to assess its compatibility and potential for irritation or allergic reactions. This simple yet invaluable step can prevent adverse effects, ranging from redness and itching to more severe issues.
Why Patch Test?
- Allergies and Sensitivities: Individuals can be allergic or sensitive to certain ingredients present in skincare products. Patch testing helps identify potential triggers before applying a product to the entire face or body.
- Product Compatibility: Not all skincare products play well together. Patch testing allows you to gauge how a new product interacts with your existing routine, preventing unexpected chemical reactions.
- Avoiding Unpleasant Surprises: Imagine finding out you’re allergic to a product after slathering it all over your face. Patch testing minimizes the risk of such unwelcome surprises.
Where to Patch Test: Debunking the Myth
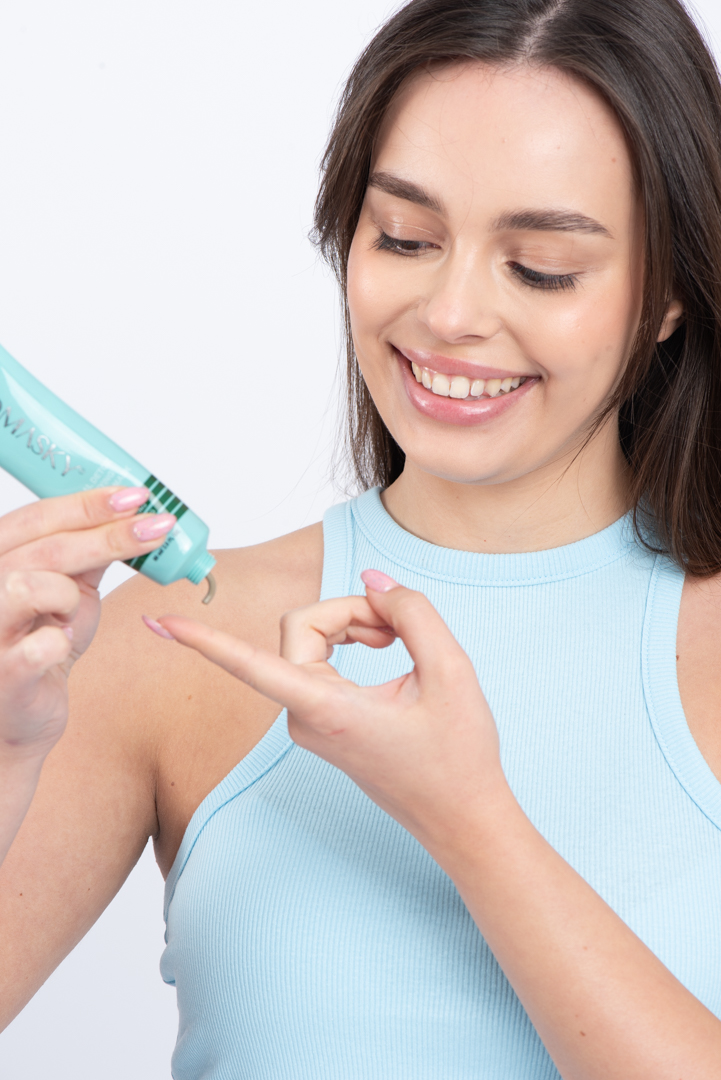
Contrary to popular belief, the inside of your wrist may not be the most accurate place for a patch test. The skin on the inside of your elbow is more closely related to facial skin, making it a better indicator of how the product will react on your face.
How to Perform a Patch Test: Step by Step
- Select the Testing Area: Choose a small, inconspicuous area on the inside of your elbow.
- Cleanse the Area: Ensure the chosen area is clean and free of any other products.
- Apply a Small Amount: Dab a small amount of the product onto the skin, keeping the application contained within a one-inch diameter.
- Observe and Wait: Allow the product to sit for at least 24 hours when its a cream or lotion. Observe any signs of redness, itching, or irritation during this time. If it’s a mud mask, clay mask or any other rinse off product, anywhere between 10 and 15 minutes will be enough.
- No Reaction? Proceed with Confidence: If no adverse reactions occur, you can confidently incorporate the product into your routine.
Conclusion:
In the quest for radiant and healthy skin, a patch test acts as a preventive measure against potential skincare woes. Remember, the inside of your elbow is your go-to spot for accurate testing. By dedicating a little time to this essential step, you pave the way for a smoother, more enjoyable skincare journey.
